

Butterfly Valve Selection, Installation, Troubleshooting & Maintenance Guide
The core of butterfly valve technology lies in its "eccentric" design. Different structures suit vastly different working conditions.
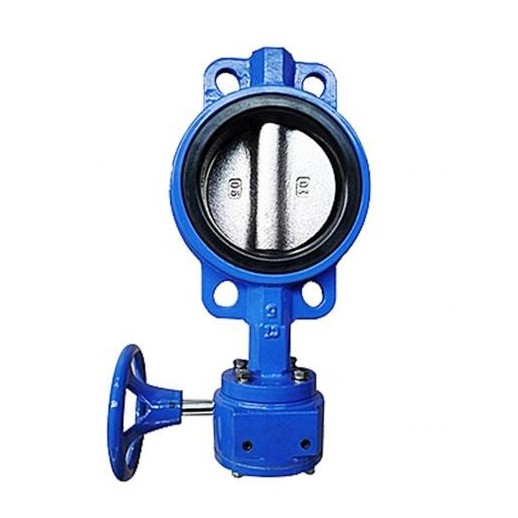
| Type | Design | Characteristics | Best For |
|---|---|---|---|
| Concentric / Zero-offset | Shaft center, disc center, and body center all align. | Simple structure, but the disc constantly rubs against the seat during opening/closing. High wear, short service life. | Normal temperature, low pressure, non-critical services (e.g., water distribution). |
| Double-offset | Shaft center is offset from both the disc and body centers. | Disc lifts off the seat quickly after opening, greatly reducing friction and wear. Longer life. Can use metal seats for wider temperature range. | The most widely used type – general industrial applications, HVAC, water treatment. |
| Triple-offset | Adds a third angular offset to the sealing cone axis. | Sealing is based on contact pressure, not elastic deformation. Offers high temperature resistance, bubble-tight shutoff, and minimal leakage. | Severe services – steam, high-pressure, cryogenic (LNG), and PSA gas separation plants. |
Pro Tip: For high-temperature steam or critical process services, always opt for triple-offset metal-seated valves. For simple water lines, a concentric rubber-lined valve is sufficient and cost-effective.
Installation Guide: Two Details That Make or Break the Job
1. Flange Matching – The #1 Reason Valves Won't Open
A very common field complaint is "the valve won't open after installation." The culprit is almost always using a standard flat-face (FF) or raised-face (RF) flange instead of a butterfly valve-specific flange.
-
The Problem: Standard flanges have a smaller inner diameter (ID). When bolted up, the flange ID physically traps the disc, preventing it from rotating.
-
The Fix:
Always use the manufacturer-recommended butterfly valve flanges (often with a larger ID).
Before installation, physically measure and verify that the flange ID matches the valve's inner bore diameter.
2. Positioning – Give the Valve "Breathing Room"
-
Upstream/Downstream Straight Pipes: Install the valve at least 4–6 pipe diameters away from pumps, elbows, or tees. This minimizes turbulence and flow-induced vibration, which can damage the seat and affect control accuracy.
-
Installation Position: During installation, keep the disc in the cracked-open (partially open) position (~10–15°). This protects the soft seat from being gouged by the disc edge if accidental impact occurs.
Troubleshooting: Common Field Problems & Solutions
| Problem | Possible Causes | Solutions |
|---|---|---|
| Leakage Across the Seat (Internal Leak) | 1. Debris (scale, weld slag) trapped on the sealing surface. 2. Disc not fully closed (actuator limit stop misadjusted). 3. Uneven flange bolt torque distorting the seat. | 1. Flush the line or manually clean the sealing area. 2. Re-calibrate the actuator travel limits to ensure full closure. 3. Re-torque flange bolts evenly in a star pattern to the specified value. |
| Leakage at Flange Gaskets (External Leak) | 1. Gasket aged or incompatible with the media. 2. Uneven flange bolt tension. | 1. Replace with media-compatible gaskets. 2. Use a torque wrench to evenly tighten bolts to spec. |
| Sticking / Hard to Operate | 1. Valve left idle for too long (rust or sediment build-up on the stem/bearing). 2. Solid particles entered the bearing clearance. | 1. For idle valves, cycle them at least once a month to prevent seizure. 2. For seized valves, try gently tapping the disc with a mallet while applying penetrating oil. Severe cases may require bearing replacement. |
| Stem Leakage (Packing Leak) | 1. Packing material dried out, aged, or chemically incompatible. 2. Stem scratched, corroded, or bent. | 1. Select the correct packing for the temperature/pressure/media. 2. Replace the stem and packing. Always operate slowly to avoid stem damage from sudden torque spikes. |
Maintenance Best Practices – Prevention is Better than Cure
-
Regular Exercise: For valves that are not used frequently, operate them fully open to fully closed at least once a month. This prevents the disc and seat from "freezing" together due to sediment or minor corrosion.
-
Lubrication: Regularly inject lithium-based or manufacturer-recommended grease into the grease fittings (if equipped). This is especially critical in coastal or high-humidity environments to prevent stem/bearing corrosion.
-
Check Actuator Health:
For electric actuators: Check for proper voltage, limit switch functionality, and gearbox oil level.
For pneumatic/hydraulic actuators: Check for air/oil leaks, filter cleanliness, and consistent supply pressure.
- Monitor Seat Wear: If you notice the actuator taking longer to fully close the valve, the soft seat may be wearing out. For critical services, consider scheduling a seat replacement before a leak occurs.